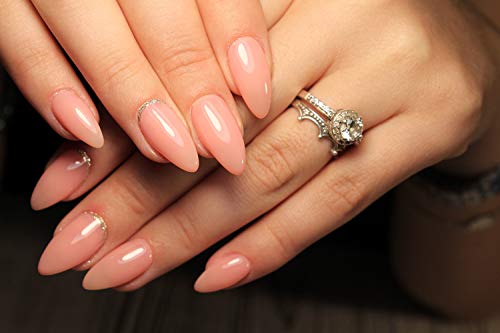
Polygel nails have a reputation for being strong, long-lasting, and flexible. While these characteristics may make Polygel nails sound so amazing, not everyone has the same experiences with them. Because they’re still a relatively new addition to the various types of nail extensions and manicures you can choose, not everyone is as experienced with applying Polygel nails.
So, whether you put your Polygel nails on at home, or had them done in a nail salon, you could be experiencing less than ideal results. If you’re asking, “why do my Polygel nails pop off,” you’re not alone. With a few small changes to your application routine, we think you’ll be able to achieve results that you’ll be much happier with — keep reading!
Table of Contents
- Why Do My Polygel Nails Pop Off?
- How Do You Get Polygel Nails to Stay On?
- How to Apply Polygel Nails
- Proper Application Should Help Your Polygel Nails Last Longer
- FAQs
Why Do My Polygel Nails Pop Off?
Ugh, why do my fake nails keep popping off?
If this is you, and you’re so frustrated that the Polygel nails you tried so hard to apply yourself or that you paid to have professionally applied aren’t staying in place, we understand how frustrated you likely are.
When applied correctly, Polygel nails should stay in place for quite some time. So, if you’re experiencing problems with your nails popping off, it probably means that they weren’t applied correctly.
One of the most common mistakes individuals make when applying Polygel nails is not fully prepping their natural nails. Before applying Polygel nails, it is essential to clean and buff your natural nails.
Another possible explanation for why your Polygel nails are popping off is that you used too much of the slip solution. If too much of the slip solution is used, it can make it flood on your nail. If this happens, the solution won’t be able to harden as it is supposed to. The solution can slip around the nail or make it pop off all together—clearly things that you don’t want to have happen.
Some individuals have very soft nail beds. If this is the case for you, you’ll likely notice that your Polygel nails are popping off from the free edge.
How Do You Get Polygel Nails to Stay On?
Why do my Polygel nails keep snapping?
As we mentioned above, Polygel nails shouldn’t be snapping off, especially after just a few days of wear. This nail type should stay on until filed off. So, if your Polygel nails have been snapping off, it is telling you that something is wrong.
One explanation is that your nails weren’t prepared correctly. If you notice that your nails are snapping from the back of the nail, then this is likely the case. Your nail technician (or whoever applied your nails), may not have taken sufficient time to properly prepare the nails.
To remedy this, next time you apply Polygel nails, take the extra time to make sure that your nails are properly prepared. The nails should be thoroughly cleaned to remove any dirt, oil, or nail polish residue. Preparation also involves buffing the nails—super important—to remove any shine.
If the slip solution is not used correctly, it can also cause your Polygel nails to pop off. When using slip solution, it must be given time to dry completely. The quantity of slip solution that was used will impact the drying time, so you may need to leave between 1 and 4 minutes to let it fully dry. If too much slip solution is applied, wipe it off with a paper towel.
Some individuals who have experienced problems with getting their Polygel nails to stay have found success using a nail primer. When using the primer, take care not to get any on your skin, as it could cause the nails to lift.
How to Apply Polygel Nails
Overall, applying Polygel nails isn’t too difficult. However, it is really important to follow each of the steps outlined below to ensure a proper application and to ensure that your nails stay in place and do not pop off. Depending on your comfort level, you may decide that it is best to have a professional apply your Polygel nails.
However, even if you’re a beginner, you can still learn how to apply Polygel nails yourself.
Choosing a Polygel Nail Kit will help ensure you have everything you’ll need. Just closely follow the steps outlined below, and give yourself some time to practice and experiment before expecting perfection.

Prepare Your Nails
As we’ve mentioned several times now, properly preparing your natural nails for Polygel is one of the most important steps if you want the Polygel to stay in place properly. Do not rush through this step!
Start by cleaning your nails and removing any oils, dirt, nail polish, and anything else that is present. Next, you will need to file your nails and then buff them until you have removed all the shine from the top surface.
Apply Polygel
After your nails are fully prepped, it will be time to apply the Polygel. When applying Polygel, you should start in the middle of each nail with the Polygel in a little ball. Use a small, precision brush when working with Polygel to ensure optimal results.
Smooth the Finish
Then, working with the brush dipped in the special solution, smooth out the Polygel. Make sure to cover your entire nail and shape the gel as desired.
Cure Your Nails
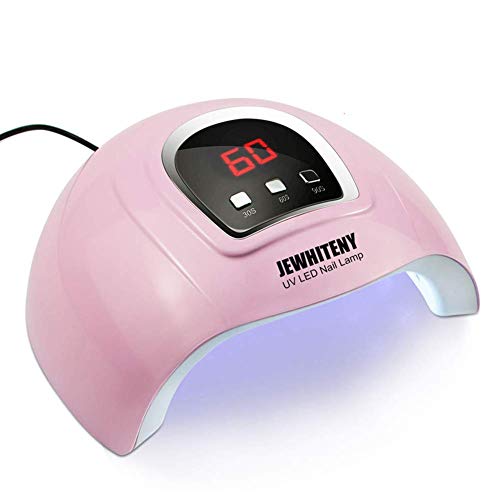
Once the Polygel is shaped as desired, your nails will need to be cured. The best way to cure your nails is to put them under a UV or LED light. Curing doesn’t take long when using LED or UV lights, and your nails should be ready for the next step after only about 30 seconds in most cases.
Shape and File Your Nails
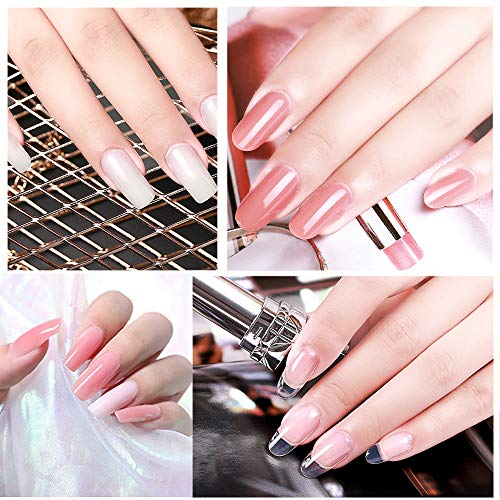
Now that your nails have cured, the next step is to finalize the shape. Because Polygel is softer than other types of fake nails, it is easy to shape using a hand file; you won’t need to use an electric file. Filing the nails helps ensure that they are smooth and even. You can also customize the shape, so be sure to know what you want before scheduling your appointment with your manicurist.
Seal the Polygel with Preferred Finish
Next, the Polygel will need to be sealed. During this step, you can decide whether you’d prefer a shiny or a matte finish.
Cure Your Nails
After sealing your nails, they will need to cure once again. Place them under the LED or UV lights again for another 30 seconds or so to ensure a proper cure.
Finish Off with Some Cuticle Oil
Last, but not least, apply some cuticle oil to finish off the manicure and moisturize your cuticles. You can also apply some hand lotion to leave your hands feeling fresh and rejuvenated to match your new nails.
Proper Application Should Help Your Polygel Nails Last Longer
If you’ve been asking, “why do my gel extensions keep coming off,” we hope you’ve found the answers you were searching for. If you want to know how to make Polygel last longer, remember to make sure that your nails are properly prepped and that your nail technician (or you) applies the nails correctly using the steps outlined above. When applied correctly, you should be able to enjoy your Polygel nails for up to three weeks, which really is quite amazing.
To learn more, check out these related posts on our blog:
- When You Get Your Nails Filled Can You Change the Color
- Green Nails from Fake Nails
- How to Take off Acrylic Nails without Acetone
FAQs
Why does my Polygel have air bubbles?
How do I stop my Polygel from bubbling? If you have air bubbles in your Polygel nails, it is likely due to improper application. When you apply Polygel nails, you should always press them down on the natural nail, starting at the cuticle end. Working from the cuticle down to the free edge helps prevent air from getting trapped beneath the Polygel, which can cause air bubbles. On the other hand, if you press the nails down from the free edge, there won’t be a way for the air to escape. It can get trapped beneath the gel and leave air bubbles.
How long does Polygel last?
When applied correctly, Polygel can last for up to three weeks. This is probably why it has been gaining so much popularity and interest recently.
If you haven’t been able to achieve these long-lasting results and want to know how to make Polygel last longer, remember the tips we shared above. Proper nail prep is key when applying Polygel. Also, remember to ensure that only the correct amount of slip is used during the application. If you had one bad experience from a nail salon, it could just be a fluke. However, if your Polygel nails keep popping off after visiting the same salon, you may want to find a new salon or a new technician to work with.
